
I have never been a big fan of the commercial flower presses. They are fiddly to use, a fixed shape and usually too small at that.
Normally I just press flowers between by inserting them between kitchen roll and sticking them inside a big heavy book. This is fine at home, but when out and about and working with children, it’s impractical.
So this is my DIY clipboard flower press. The idea came from the wooden lattice frames that plant collectors use when creating herbarium specimens.
However, rather than make up the wooden frame, I realised that I have lots of clipboards ranging in size from A5 to A3 all of which provide a good sturdy frame.
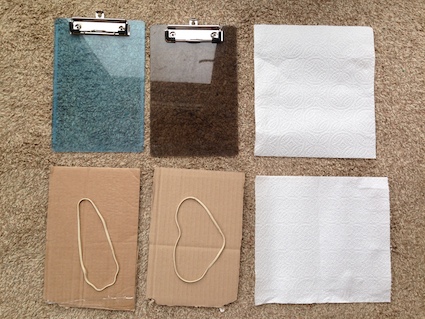
To make a clipboard flower press you need two clipboards, two pieces of box cardboard cut to fit the size of your clipboards, kitchen roll and elastic bands. You can see the example in the first photo.

The clips of the clipboards need to be facing outwards. So on the back of one clipboard, place one sheet of cardboard and a piece of kitchen roll. Add the flowers in an arrangement of your choice. My flowers came from my front garden.
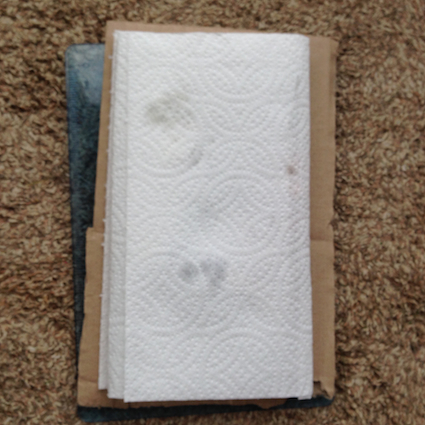
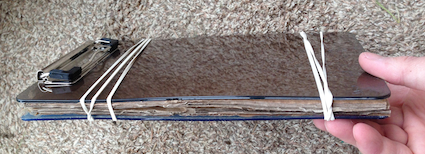
Put the second piece of kitchen roll over the flowers. Then add the next piece of cardboard and the second clipboard. The elastic bands are wrapped around the clipboards to keep everything in place and add pressure to dry and press the flowers.
This system is ideal for schools and nurseries who can then encourage children to press gathered flowers. Remember to follow your country’s advice about picking wildflowers. The Wildflower Society has a code of conduct which is helpful for UK schools and organisations.


This is the perfect project to have a go at with my daughter this weekend. I’m a florist and she loves it when I bring the unused stock home from work, shes 5 and fascinated by the pretty colours and scents. She will love this!