Recently on the Creative STAR Facebook Page I showed this wonderful photo of a wind tunnel created by a space blanket. Sadly, it ripped almost immediately after the photo was taken. I really didn’t want to chuck it out as I felt that was a waste. So instead I decided it would make fine kite making material.
It has been years since I made a kite! When I was a countryside ranger, I was lucky enough to attend a kite making workshop. It has stood me in good stead over the years, especially early on as a young teacher. There are so many different varieties of kites for all ages and abilities. Sled kites are very forgiving when homemade so are a good one to begin with.
If you are thinking of undertaking this activity with your class, in my experience this type of kite is definitely for upper primary children and beyond. It requires careful, accurate measurements and attention to detail. Practice makes perfect.
Making the Kite
Firstly you need to gather your stuff. I had colourful plastic bags, the space blanket, a ruler, 30cm bamboo skewers, sellotape, a hole punch, strong cotton thread, permanent marker pen and a pair of large scissors as well as a pair of small nail scissors.
The first step is to fold the space blanket in half. With kites equal weight and balance is needed on both sides of a kite. The fold is the centre axis of symmetry going down the length of your kite.
The dimensions of the kite are made to suit the length of the skewers. The kite is 30cm long. Mark both ends with a line 9cm, perpendicular to the centre fold. In the photo below, the skewer joins the ends of the lines drawn.
Below the skewer you can see the outline shape of the kite – its wings. The widest point is 10cm down from one end of the skewer (and 20cm from the other end). It comes out from a perpendicular line also 9cm in length down from the skewer.
The next job is to carefully cut round your outline. Then open the kite out and attach the skewers 9cm at either side of the centre fold. Attach the skewer with sellotape. Remember to cut each piece to the same size and place it in the same place on each skewer. Kite making is all about symmetry of pattern and weight.
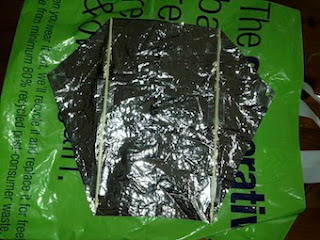
There is no need to decorate your kite, but I rather like funking things up. This is why the coloured plastic bags are needed. Again, thinking about the symmetry can help. Along the fold I cut out two triangles and squares.
These have been placed in a symmetrical pattern onto the kite and the edges sellotaped. When this happens, care is needed to ensure the sellotape covers line where the pink and the silver colours meet, all the way around the shape.
Next turn the kite over and rub the shapes thoroughly so that the sellotape lines show through. Very carefully, remove the foil within each shape. The inner line of the sellotape will gently guide your cutting movements. This allows the pink to show both sides of the kite.
To attach the tails, cut two equal lengths of foil and attach to the kite at the end of each skewer. Add a double layer of sellotape to each wing and use the hole punch to create holes. If you fold the kite before doing this, you will get the holes symmetrically balanced too. Add strong thread to each hole and tie in the centre with a loop. Attach a reel of string or thread to this loop.
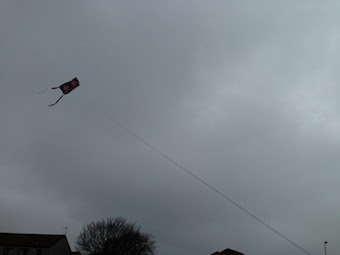
And now it’s time to test the kite! It was a little too windy really but I decided to give it ago. My kite flew beautifully and went so high that I almost ran out of string! This kite works best in moderate to gentle winds.
With kite-making, so many skills are required which demand accuracy and precision. It is about maths and understanding symmetry and balance. It’s the cutting and measuring skills of technology. Then it’s about the patience required to develop the art of flying a kite. A skill which humans all over the world have been undertaking for thousands of years. A lovely legacy to inherit and continue 🙂







That looks like a fun little project for my boys to do when they’re a bit older. I like the way you had the pink showing through on both sides 🙂
What a fantastic idea for recycling the space blanket, one to inspire our older boys. Thanks for linking up to Country Kids.
This is fab! Thanks for sharing 🙂 x
http://mumx3x.blogspot.co.uk
We tried making a kite before and ours failed dismally, mostly due to my inability to follow the instructions so thanks for the great guide. Maybe we will get it right this time! Thanks for sharing at the outdoor play party