Some practitioners work in settings and schools where they cannot leave equipment out overnight. Usually storage space is pretty tight too. Thus I wanted to look at ways of creating simple, portable water walls which children could create themselves.
Many years ago I did class cover in a large city school with mainstream and additional support needs (ASN) classes at every primary stage. I never felt I was in a big school with 21 classes and an 80-place nursery. The Primary 6 ASN class I worked with was always up for practical design experiments.
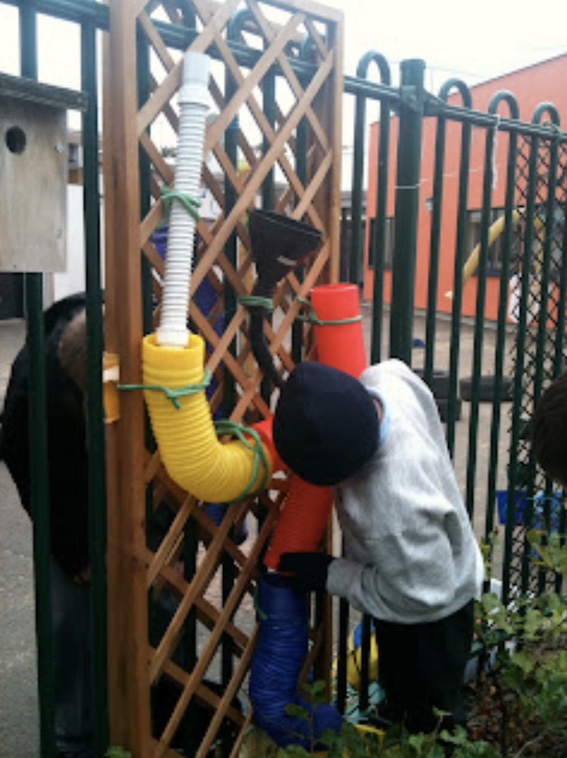
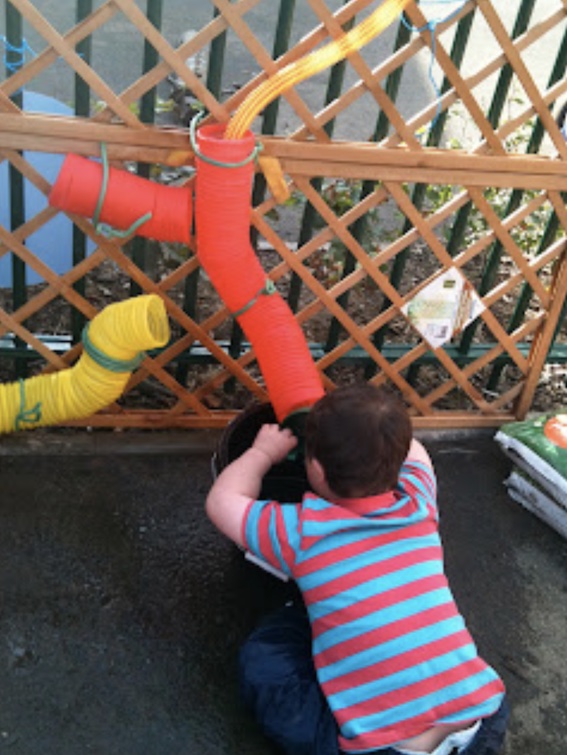
Firstly we tried a water on a static lattice frame bought from a local garden centre. The beauty of these is the diagonal structure. This means that all the pipes and bottles tend to be fixed quite naturally with a lean on one side. Interestingly, the children opted for the animal tubes most of all from a range of materials offered. I think the bright colours appealed!
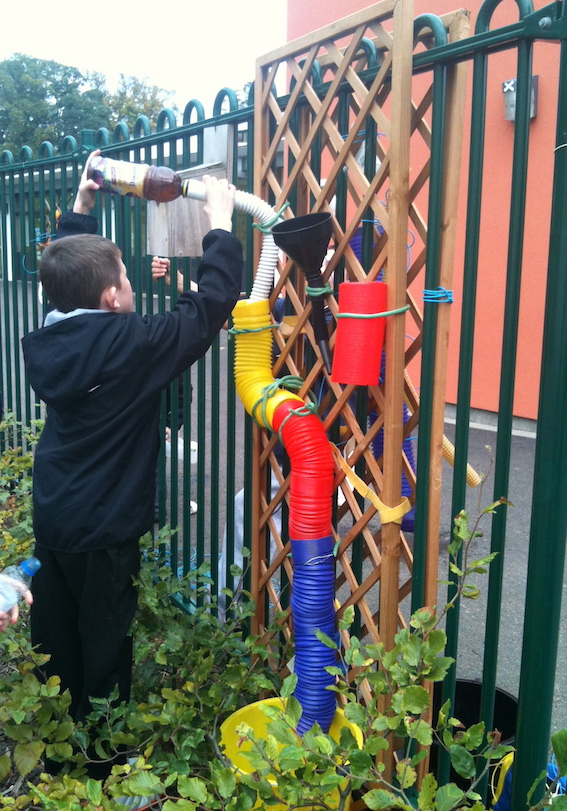
We put the lattice frames back-to-back so that the nursery children could access a water wall as well as the P1 ASN class and in the hope of generating some collaborative work through the fence. The children worked hard to ensure interesting designs. We also use a stretchy, flexible willow lattice frame available from many garden centres. This is particularly portable as it squashes tight. It’s not as wide though. Also you need to do a regular nail check prior to use.
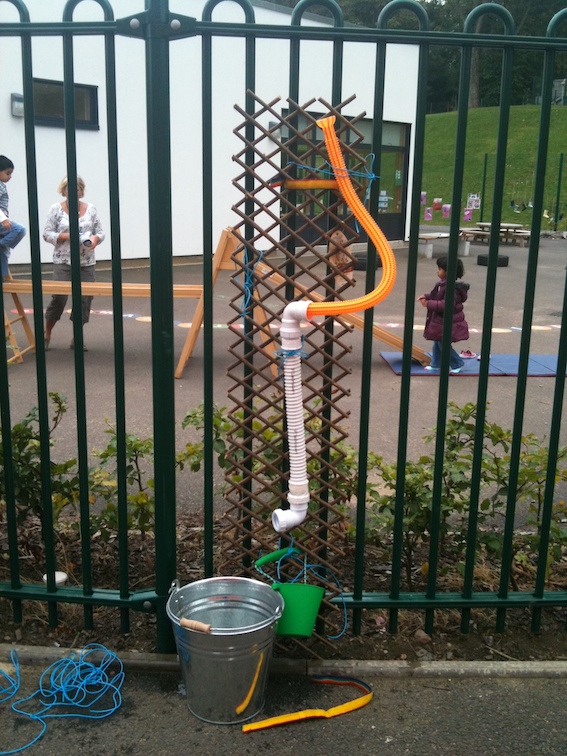
The children collected water from the nursery who were very tolerant of our constant interruptions. The children did not expect that water would be so heavy to carry.
However, all was not well. No child from either the nursery or the P1 class really played much with the water walls. The P6 children worked out why. The structures were simply too tall. So the following week, the lattice was set up horizontally and much closer to the ground. One boy spent a long time putting the water wall together that you can see below…
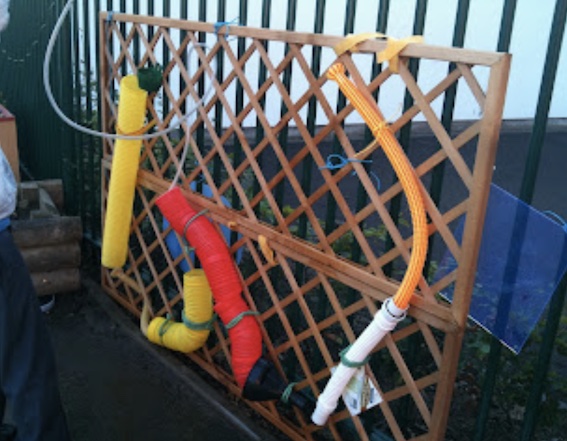
And hey presto! The wall got used for quite a while that afternoon!
Fastenings for temporary or portable water walls
The children used a variety of fastenings. I had foam-covered wire, soft anodised wire, brightly coloured plastic washing line and velcro straps available for children to use – all of which are reusable and many children can learn to use. For this reason, I never have plastic ties. The wall does take some continuous maintenance as children help themselves to the hoses and pipes during break and lunch times for their own play purposes, but no-one seems to mind this 🙂
Other types of temporary water walls
If you have a look at this blog post – Developing a Water Play Area – you will see a water wall made from a tarp, snap ‘n’ tap eyelets and ball bungees. This is the ultimate fold-up, take anywhere water wall. The children can be genuinely involved in making it. You can pick your size and the number of ball bungees required. It costs about £15 to make excluding accessories.
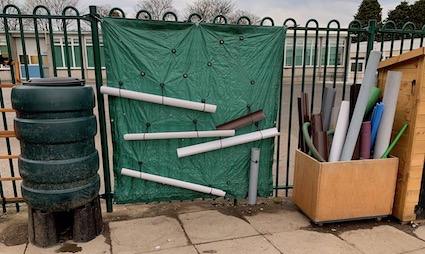
It is also perfectly easy to make a moving portable water wall on a shopping trolley or similar. Just make sure there’s brakes and that it’s not overloaded. It’s fantastic to store resources for moving in and out of a shed or indoor space but to keep items that are needed immediately to hand.
Another option is to use fixed playground equipment, as illustrated in this blog post: The Sensori Water Station. Basically it took all the staff 10 minutes working together to create. All hands on deck and same at the end of the play session. The down side is that you use up lots of tape to attach stuff – ideally we’d have just used Velcro etc. but speed was of the essence.
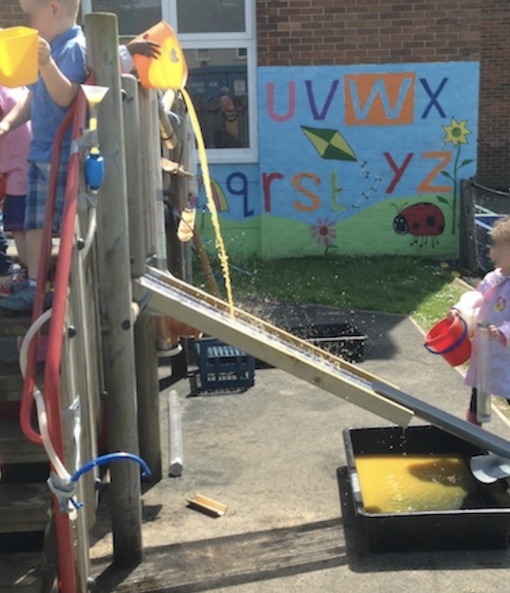
Finally some of my water walls are fancy-shmancy. But they can be much more simple. Most very young children are quite happy to explore 2 or 3 items on a wall, which can be easily changed as shown below.
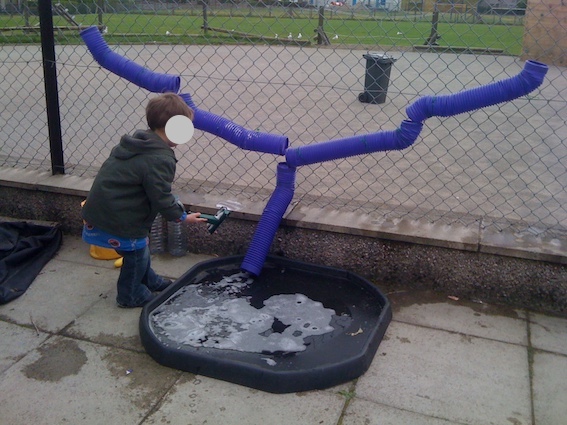
With older children constructing walls, it can be good to show them examples of possibilities via a slide show alongside viewing the range of available loose parts available. Let them discuss, sketch and plan their possibilities. Show them the range of fastenings and give them time to practice using them. Also a lot of water walls are trial and error. The older children can observe the younger children play and discuss what is working well and what could be improved. Ideally, getting an engineer – such as a parent volunteer – could also be advantageous.
Really useful resources
It would be very easy for me to provide an extensive list of resources. However this runs the risk of limiting water play and exploration of water walls. The main trick is to have:
- A plentiful range of fastenings
- Places outside where loose parts can be added to make vertical runs of different sorts
- Water canisters can be really useful to hang up high to store water or simply have at a bench – and containers for transporting the water (which can be as much part of the play for younger children). Water butts work well in some settings but not for temporary set ups.
- Collection vessels at the foot to save water for re-using. This could be planters, tuff trays, buckets, etc.
- Junk items – soda bottles and similar can easily be cut with care and this can add to the creativity. Again, do an online search for inspiration.
Finally, I’ve updated this post significantly since its original publication in October 2011. In spring 2012, the school where I was working was filmed for water play – you can see how temporary and packaway the water play was for children of all ages (and it’s a trip down memory lane as I spent 2 years working with the P1 ASN class, some of whom are featured around the guttering in this Learning through Landscapes video).
This blog post was originally posted in October 2011.








Hi Hannah
Thanks for your feedback and comment – for some reason it isn’t showing up here yet. But I wanted to let you know I received and appreciated it!
Best wishes
Juliet
Great idea, Juliet. I like the “portable” idea. Since it can be changed and moved in and out, the wall may gain more interest. Hmm.